I’ve had a 3d Printer for several years now, it was originally a creality CR10s which I bought way back in 2018ish. Since then I’ve upgraded (or at least changed it) in various ways. I added bracing rods to the front to add rigidity to the frame. I added closed loop driver boards to cut down missed steps (and just because they’re pretty cool). I swapped the driver board for a Bigtreetech SKR 32 bit control board and the print head / hotend for a direct drive option which incidently is probably the biggest upgrade I have made to my print quality. Those upgrades are all pretty straightforward and at most require cutting and splicing some 12v wires.
A few months ago though, I finally got frustrated enough with the 12v heated bed on the CR10s and the length of time it took to get up to heat to replace it with a mains powered bed. Even with the addition of a thermal fuse and an RCD socket this addition does make me worry about the dangers of mains voltage enough that I want to turn it off every time its not in use. Here’s a hastily put together diagram showing how things are linked up now:
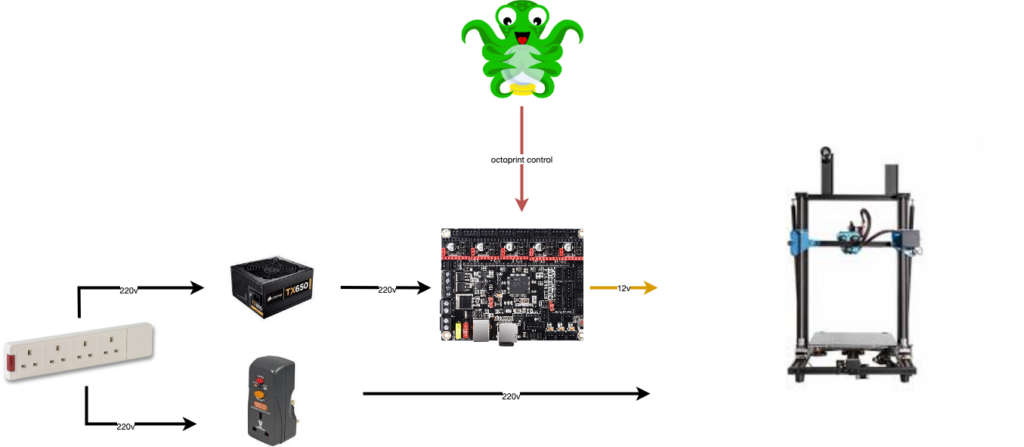
As you can see, the removal of the 12v heated bed means I could replace the high amp PSU that came with the printer with a standard ATX power supply. I use octoprint running on my kubernetes cluster to control the printer.
This setup is generally great. The mains bed gets up to heat in about 10 seconds (as opposed to minutes on the old 12v bed) but it does mean I now have 2 different things to power on and as mentioned, the possibility of electrocution is always looming in my mind despite how unlikely it is. It would be lovely if, since octoprint is running all the time I could get it to turn my printer on / off as required.
So here’s how I do that. First things first, I need to be able to switch the power on and off. Luckily I already have a pretty comprehensive smart home setup using home assistant and zigbee, and I had a spare zigbee plug lying around. That enabled me to click a button in my home assistant dashboard (or even a physical button) and toggle power to both the printer and the heated bed.
Now though, we want Octoprint to be able to control our PSU. One of the great things about octoprint as a 3d printer control software is that it has a huge number of plugins to enable all sorts of automations, controls and…just about anything you could want out of thi kind of software. For our use case, we need a couple of them.
First off is the ‘PSU control‘ plugin, which gives octoprint the concept of a PSU that can be controlled. By default you can control your PSU using GPIO (if you want to hook up a relay to your power supply for example) or a few other methods but the thing that makes this plugin truly brilliant is that it’s built to be expandable with sub-plugins, one of which allows controlling the PSU via home assistant. Here’s how these two plugins work together.
First off we configure the ‘home assistant PSU control’ subplugin, telling it about our home assistant instance and the specific entity we want to control (ie: the zigbee plug we added earlier).
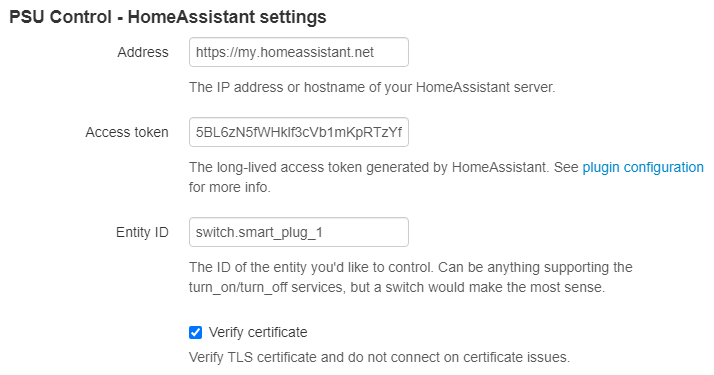
The access token you can find by going into your profile in home assistant (right at the bottom of the left menu) and scrolling to the bottom of he screen. You should see a section titled ‘long lived access tokens’. generate a new one called ‘home assistant’ and paste it into the octoprint plugin.
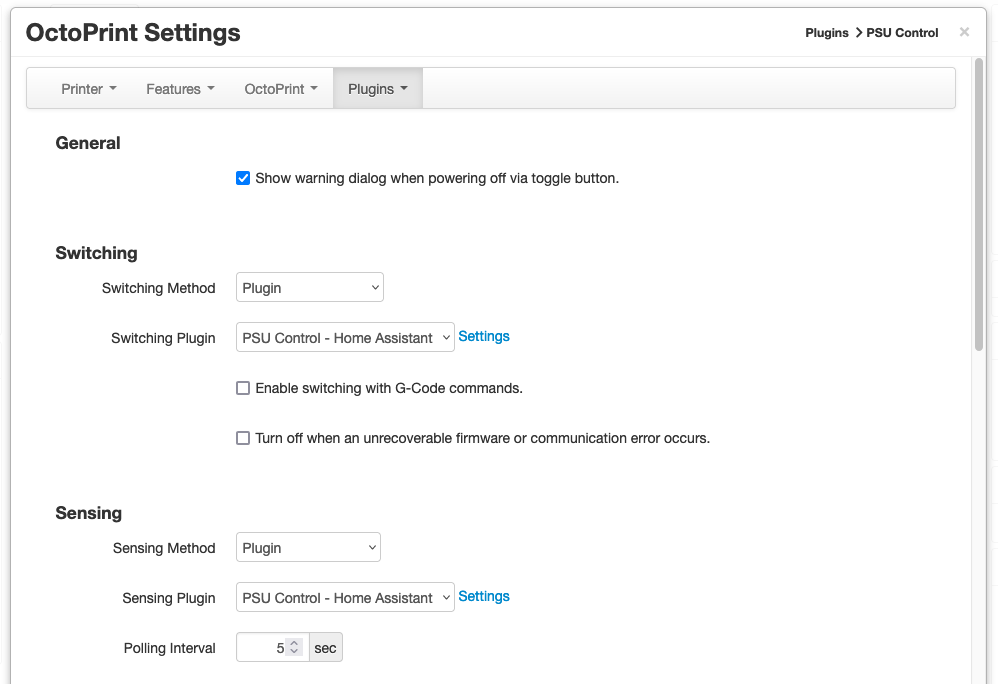
Next, we want to tell the PSU control plugin to use this sub-plugin to control the power. In the main plugin settings set both the ‘switching method’ and ‘sensing method’ to plugin, and the associated plugin to ‘PSU control – Home assistant’
There’s a couple of other settings we can add here to make Octoprint auto-connect to the printer once it’s powered on:
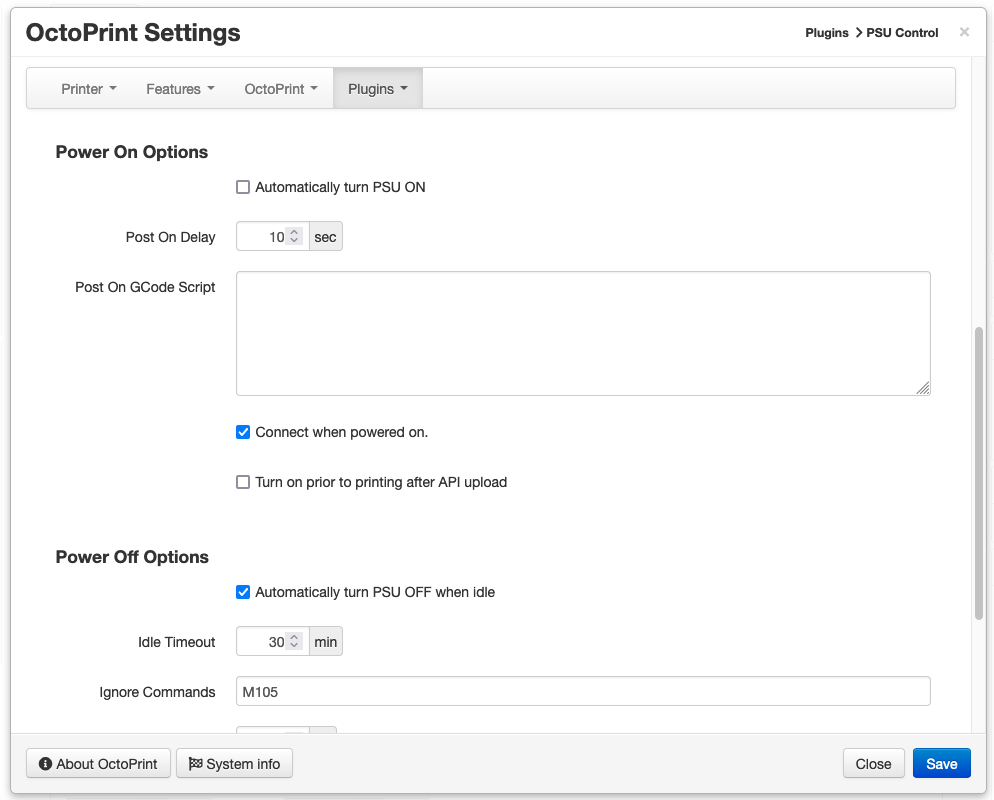
First up I unticked ‘Automatically turn PSU ON’ because I don’t want to turn the printer on when Octoprint starts. However I do want octoprint to connect to the printer when it powers on so I tick ‘connect when powered on’ and set a 10 second delay (YMMV on this delay, depends how long it takes your printer to boot). I also set ‘Automatically turn PSU OFF when idle’ with a 30 minute delay so the printer (and that heated bed) don’t stay powered long after printing finishes.
After setting all that up, restart octoprint and give it a try. You should notice a little power button appear on your octoprint interface

Click the lightning bolt and (if all is well) your 3d printer should turn on and, 10 seconds later) octoprint should connect. That’s still pretty manual though, what we ideally want to happen is for the act of sending a print job to Octorprint to trigger the power up of the printer…….
You might notice I didn’t tick ‘turn on prior to printing after API upload’ and this is because I couldn’t get this option to work. I use Cura for slicing and, when uploading to octoprint Cura checks if the 3d printer is connected to octoprint before uploading. Clearly the 3d printer is connected, so Cura just times out. Depending on what you use for slicing / how it uses Octoprint this option might work for you. Or, if you’re using Cura like me it might not. Luckily, there’s another way to do this. The Cura Octoprint plugin actually has settings to turn on the 3d printer before uploading:
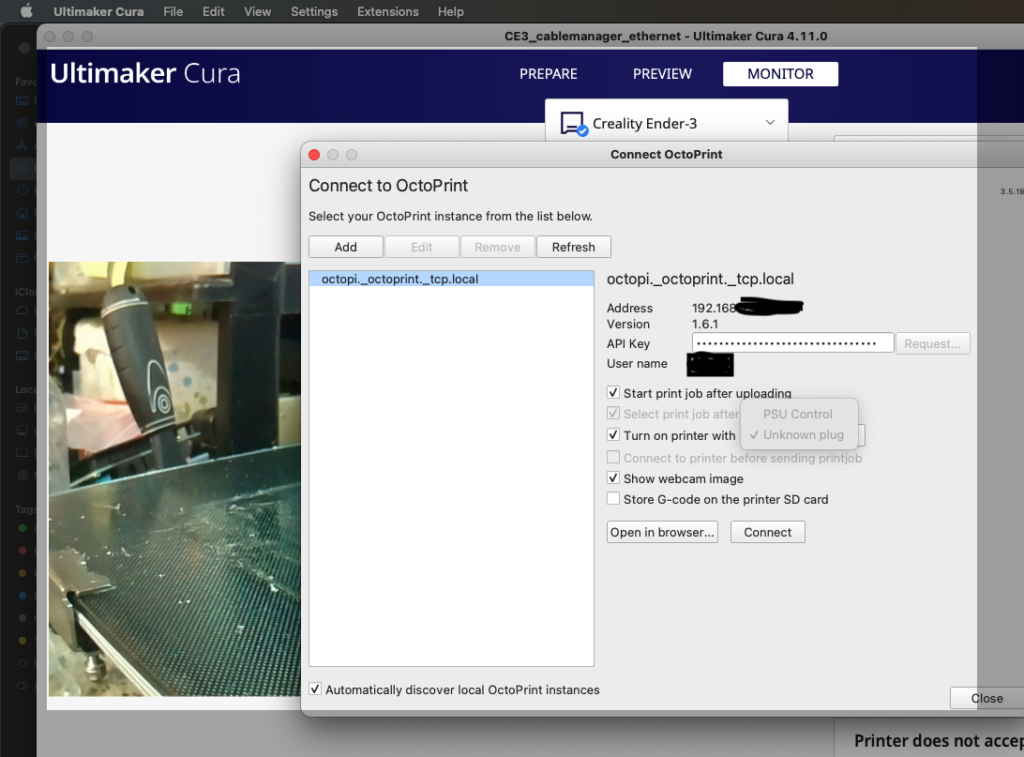
So, with that setting enabled the sequence of events is now I slice a model, hit ‘print with octoprint’, Cura tells octoprint to turn on the printer, the printer powers up and connects to Octoprint, Cura sends the sliced model to Octoprint and it starts printing. Once the print has finished Octoprint waits 30 minutes and then turns the printer off.
Perfect.
it’s also possible, although not necessary for this use case, to enable your home assistant instance to ‘discover’ octoprint so you can have information about your printer in Home assistant. There’s a few steps here, the later ones of which rely on communication with an MQTT Broker. I already had this setup since I use zigbee2mqtt for my zigbee devices, but if you don’t use mqtt with your home assistant setup you’ll need to setup a broker first. I use rabbitmq running in a container on my kubernetes cluster, but setting it up under docker or even on a spare linux machine is pretty straightforward.
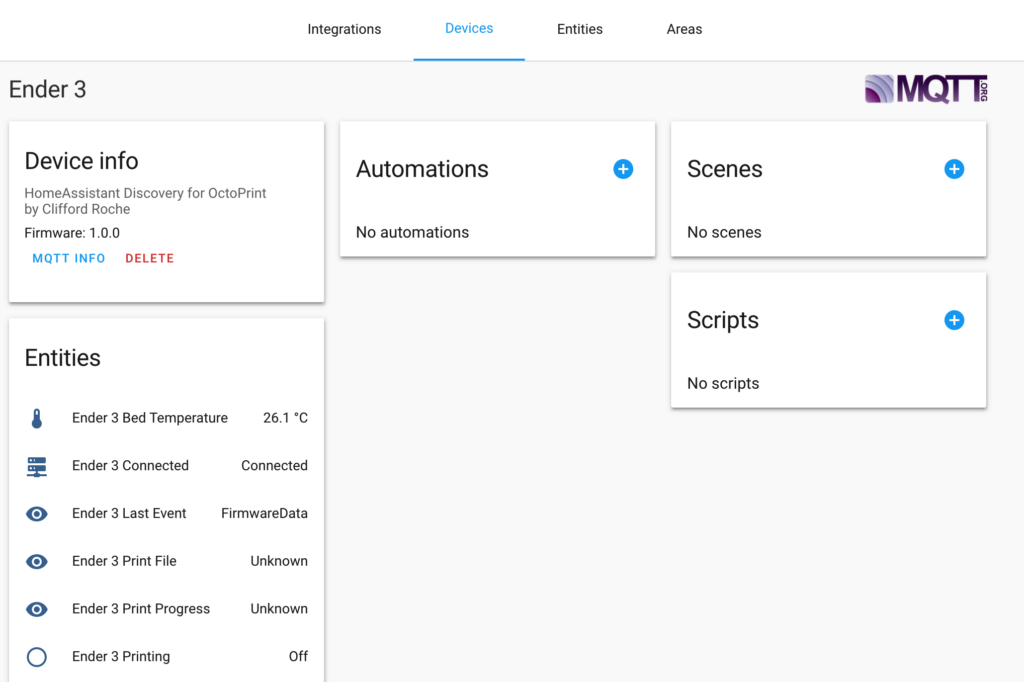
Once you have Mqtt up and running you can add the octoprint mqtt plugin. Once configured with the url / credentials of your broker this enables you to send / receive messages between your octoprint instance and the Mqtt broker we setup earlier. Which is great…..but doesn’t actually link Octoprint to our home assistant instance. For that we need another plugin, the home assistant discovery plugin. Install that, and you should see something like this in home assistant:
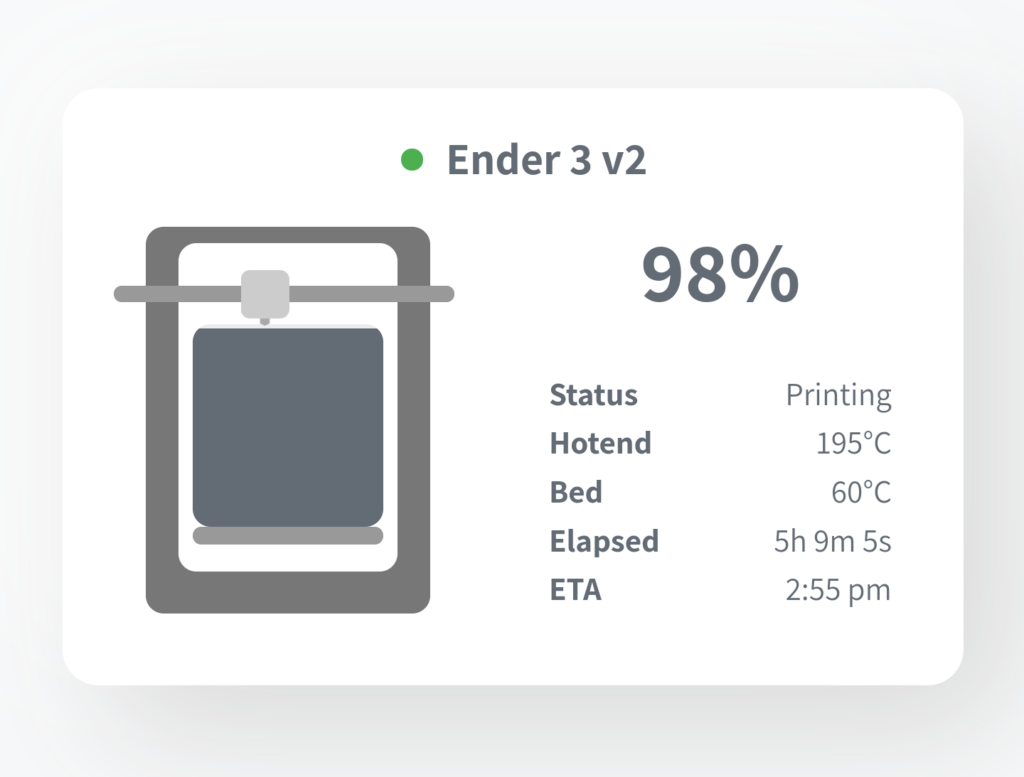
If you want that information to appear in a lovelace dashboard there’s a prebuilt card for that (available through hacs) called ‘threedy‘ which looks like this: